
Form Follows Function Examples Part 02
By Feng Zhu
REAL WORLD PERIOD PIECES
Welcome to part 02 of my design examples using Forms Follows Function. If you haven’t read part 1 yet, please follow this link. I’ll be using one of my favorite design approaches, method #5, Real World Period Pieces.
For this project, my aim is to bring the environment of Shanghai in the 1930s to life. The examples here illustrate a good insight into the types of content we typically generate for the real entertainment industry.
As I’ve mentioned numerous times, design is not just about “making stuff up.” More often, games and films take place in our existing world. If you are looking to build an industry relevant portfolio for 2019 and beyond, then I highly advise you to include at least one period piece project consisting of minimum 3 to 5 images.
When Art Directors review these works, they can immediately identify a few key points in your portfolio; especially when you are applying for a junior entry-level support role. Remember, always understand your job scope before applying and build a portfolio to match. Here are the key points these images can address:
Referencing ability - there’s no way you can remember historic visuals perfectly in your mind. Thus, to complete these pieces, you must have researched and gathered references. Great! That’s exactly what we ADs want to see. We want to avoid junior designers who think that they can do everything from their heads and refuse to use references - a dangerous belief that can hurt production.
Proportion recognition - getting references is one thing, but can you replicate the same forms in your work? The ability to capture accurate proportions and scale are fundamental skills all designers should have. If you can’t translate forms accurately, then what good are the references?
Visual storytelling - reality is sometimes too real and can even be boring. In entertainment, we often combine the best set pieces from reality to conjure up “new” sets which hit all the key selling points. In a way, we are designing what you would “perceive” the world to be instead of the actual reality. This skill can separate a mediocre designer from a highly valued designer.
Adopting design languages - can you capture the design styles of a particular time period? Are you adding the correct details? If you can prove this skill with period pieces, then you probably can adopt other design languages as well. Perfect! You are now a versatile designer who can jump from project to project within a studio - making you a “must have” team member that producers & art directors fight over (a good thing for you!).
Able to stay grounded - as mentioned in my original article, we need designers that can work on grounded projects. As a junior designer with no experience, if you think period pieces or grounded projects are beneath you or way too boring, we will avoid you at all cost. When starting out, you are not in the position to choose. Show us that you are able to make anything cool, not just on things you want to draw.
ONTO THE PROJECT
When starting any project, we need to establish the overall backstory, direction and stylistic vision. Since this is an example project, we don’t need to make it super deep. I chose classic adventure films as my aim. I grew up on these movies and always have a soft spot for them. These films always start in a well known city and then proceed to take the audience on a wild ride to exotic locations.
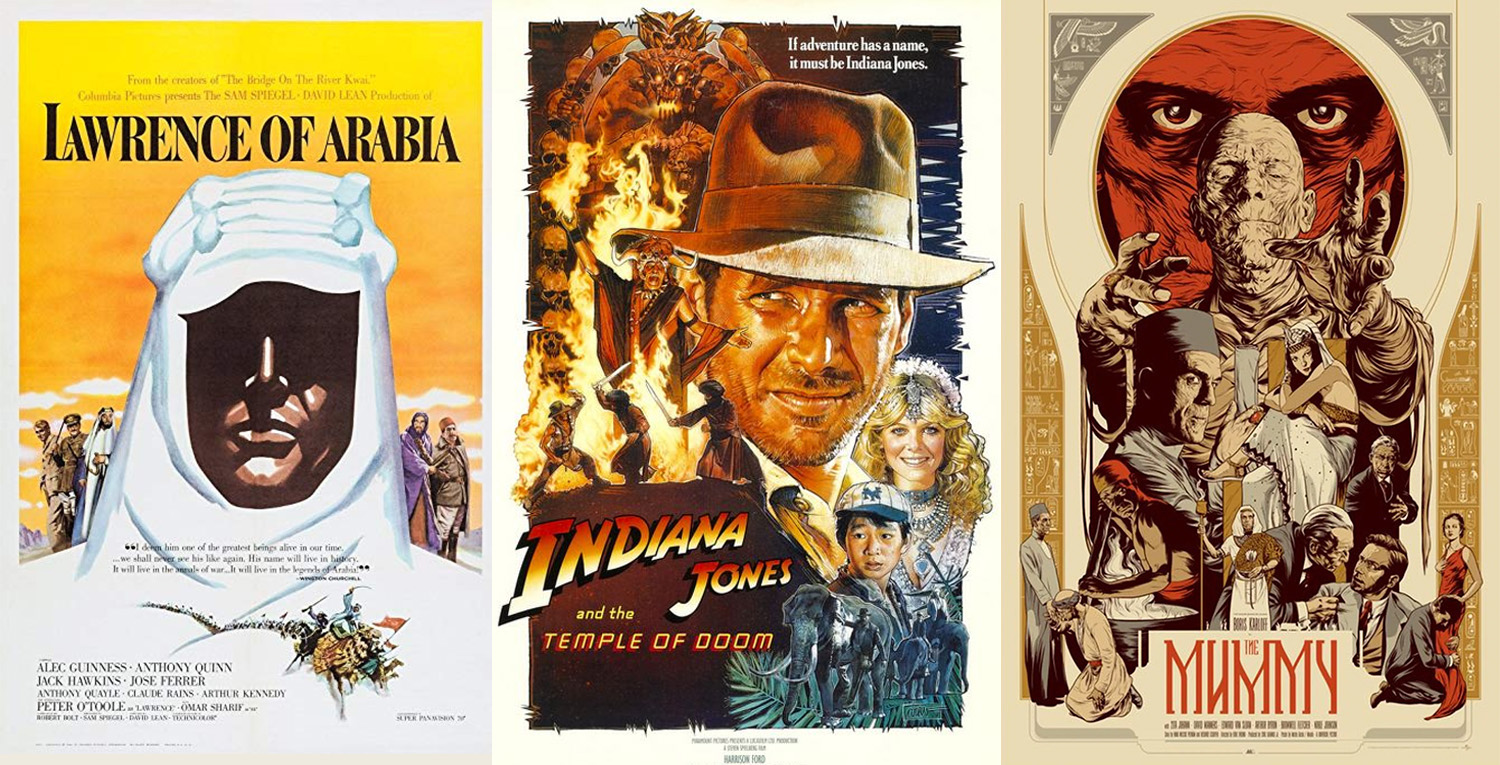
Lawrence of Arabia (1962), Indiana Jones and the Temple of Doom (1984), The Mummy (1932)
ALWAYS GATHER GOOD REFERENCES
You simply CAN’T do period pieces without proper references. So gather as much as you can before starting. The reference shown here is just one of the examples. Make sure to prepare at least one page of references for each set you do. And use them!

Shanghai in the 1930s is a wonderland of visuals.
START WITH ESTABLISHING SHOTS
As a general rule to sell any project, I like to start with establishing shots - the camera is pulled back, higher up and set on wide FOV. This gives the audience an overview of the world they are about to enter. Follow up the establishing shot with a few street level scenes and building exteriors.Using these images, we are able to showcase the architecture, vehicles and fashion styles of Shanghai in the 1930s.

Shanghai 1930s establishing shot. Shanghai is a port city with strong European influenced architecture. It was also a time of new technologies, fashion and the arts. Shanghai was considered to be the New York of Asia at that time.

Street view showcasing a mix of East meets West. Electric trolleys introduced by the Europeans intermingle with the rickshaws and bicycles.

Building exterior view. This is also a good time to introduce fashion, vehicle and street life into the scene (shoeshiners, street sweepers, etc.).
INTERIOR SHOTS
Once the exteriors are established, we must do a few interiors. Interiors are generally harder to design due to the confined spaces, refined details and limited use of lighting. However, since this is our job, it's important to showcase your skills here. And for the hundredth time, use those references! Don't attempt to design history on your own. The whole point of period pieces is for you to design within the time period.

Art collector's office near the shipping docks. Big windows allow us to see the surrounding environment as well as allow for different lighting scenarios. European furniture suggest that this collector is a foreigner. The addition of Chinese art in crates further illustrate the role of this office.

Chinese archaeologists' office. The real place might not have been this "entertaining" but it's our job to make this set look fun and tell a visual story. All architecture, furniture and props were referenced to capture the vibe of that time period.

Foreigner archaeologists' office. Furniture, architecture and lighting was changed to contrast that of the Chinese office.
TRANSPORTATIONS
Classic adventure films always include transportation vehicles. The most widely used are ships, trains and airplanes. These places are often crowded with people as well.
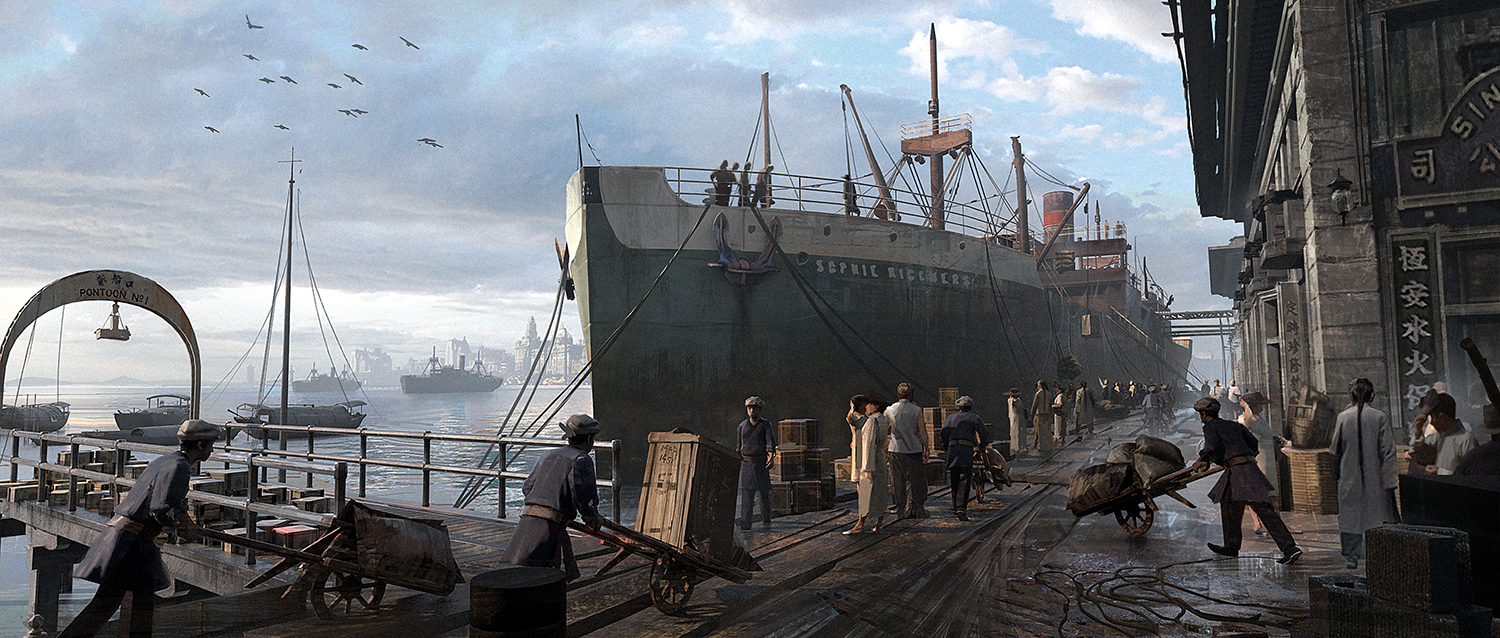

Busy docks.

Classic steam train and station. Shanghai's train stations were actually pretty simple at the time. To make the place more interesting, we added in an European-styled station to the left. To balance the composition, few trucks were added to the right.

Warehouse. Workers are busy packing stolen artifacts into wooden shipping crates.
EXOTIC LOCATIONS
After days of travel, we arrive at remote towns. Notice the environmental variance between each town. Remember, the point of these images is to showcase your design abilities. Keep things varied and don't repeat the same things over and over.

Remote town located near the Himalayas. The Chinese team is unloading their supplies from the back of donkeys.

A town hidden in a tropical forest along the river. Inhabitants here rely on fishing and exporting for survival. The arrival of the foreigner ship can be seen under the wooden bridge.

To contrast the wintery and swampy environments, we introduced a remote desert town. This place is hot, dusty and dry.

The expedition team arrives on camel. The town is located around a small lake within a valley.
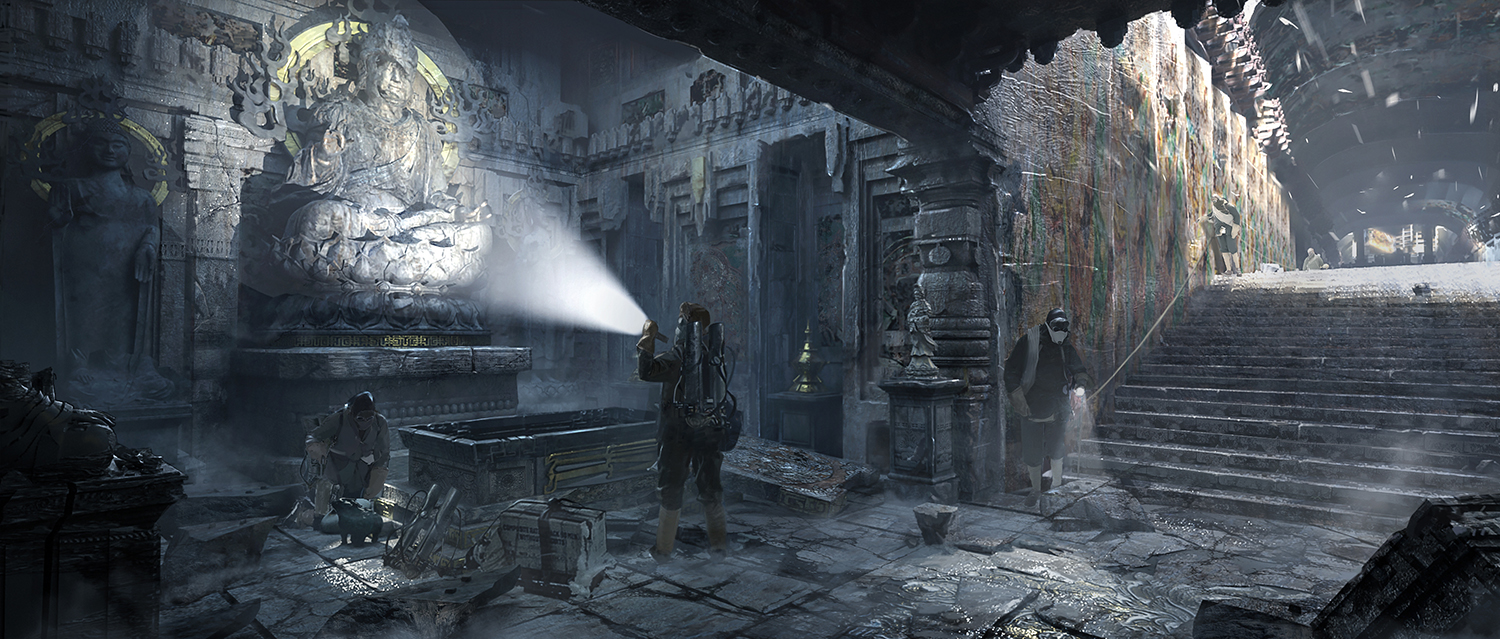
THE SECRET TEMPLES
The final selling point of these adventure movies - the temples!

With the help of villagers, the expedition team finds the lost temple of the desert.

And the pillaging of artifacts begins!
USING "BAD" PHOTO-BASHING
Here I will share a bit of my process which is slightly different from the previous examples.
Five years ago, “photo-bashing” became all the rage. But for students with bad fundamental skills, photo-bashing often resulted in horrible images. However, since we now use 3D to supplement perspective and play with composition, we can use photo-bash as a design tool instead.

Instead of using photos to complete the final image, I simply use it as a way to sketch. These images can be super ugly; even the perspective is way be off - it doesn’t matter at this stage. The goal here is not to make beautiful images, but to find the design.

Once I like the design from the rough photo-bash, I’ll do quick 2D sketches to figure out the details. In this case, I want to design a temple that uses wind to keep out unwanted visitors. The towers are essentially huge turbines; generating wind into the tunnels beneath.

Now that the design and functions are figured out, I'll do a rough sketch to establish the overall composition and "sell" the idea.

The final image. Notice the mountain climbers are carrying equipment matching the time period. To indicate higher altitudes, the sky is made darker while the angle of the sun is lowered.

Another example utilizing the same process. This is the rough sketch for the interior. The adventurers are blasted by heavy winds. The inner function of the towers are also indicated here.

The final image showcasing the ancient turbines and surrounding architecture. The opened ceiling allows viewers to see the other towers; thus visually connecting the towers and their function.
Tombs are located under each tower; away from the strong winds.
PIPELINE PROCESS
The processes used is similar to part 1, except for the addition of “bad photo-bashing” to aid in design. All sets were first built in 3D then painted over in Photoshop.

Notice the right two images started with "bad photo-bashing" instead of 2D sketches.

For these scenes, the designs were started without any sketches because we had plenty of references.

Additional processes.
